Best of . . .

We all have things we need to tell people—Thank you, Love you, You’re in my thoughts, With sympathy, and so on. This month’s Best Of stamp set, “Best of Greetings,” is exactly what you need to share those special thoughts with important people in your life. Your cards, tags, or gifts don’t have to take a lot of time, either.
This Thank You card is made with Whisper White Cardstock and three Classic Stampin’ Pads: Island Indigo, Pool Party, and Basic Gray. Put one corner of the ink pad directly on to the cardstock and swipe it all the way across. The imperfection of the lines gives it a watercolor look—which is very trendy right now. Use up scraps to punch out little hearts, attach them to paper (sew them on or use adhesive), and stamp “Love you” for a little love note.
A little extra time and thought on your part could make a huge difference in someone else’s life . . . and might be just the thing they need that day.
Angie B.
Sr. Concept Artist
share
Contact me today to order this set before it leaves again!
lisacoffey.stampinup.net
show 1 comment - Tweet
- Pin It
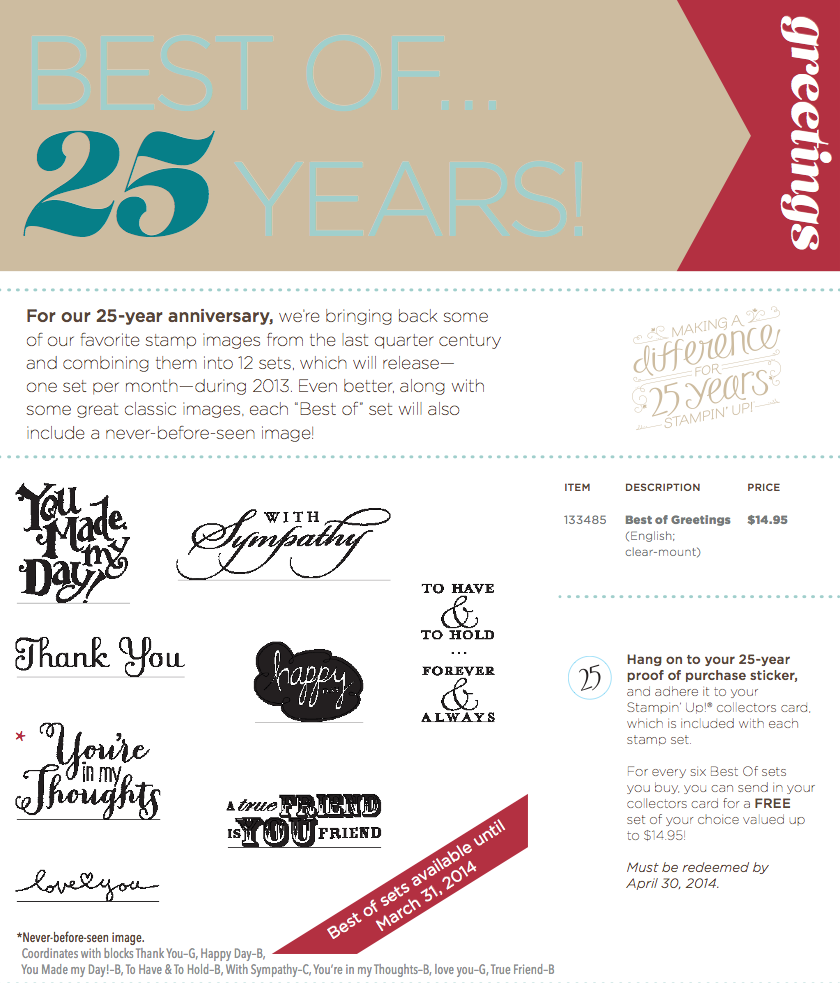
For our 25-year anniversary, we’re bringing back some of our favorite stamp images from the last quarter century and combining them into 12 sets, which will release— one set per month—during 2013. Even better, along with some great classic images, each "Best of" set will also include a never-before-seen image!
| ITEM | DESCRIPTION | PRICE |
| 133485 | Best of Greetings (English; clear-mount) |
$14.95 |
Contact me today to order this set before it leaves again!
lisacoffey.stampinup.net


